Introduction |
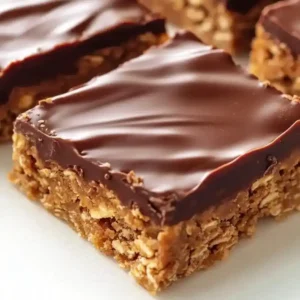
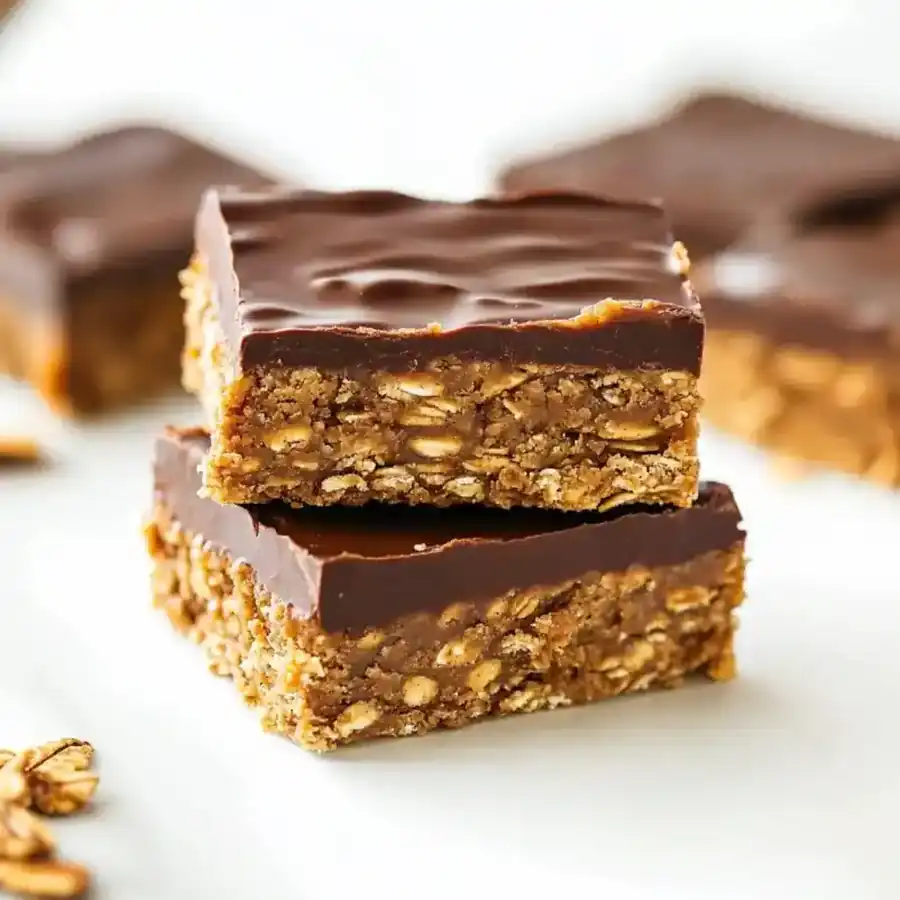
When summer heat makes a gym session feel like a sauna, nothing fills the gap faster than a hassle‑free snack from the pantry. That’s what I discovered with these no‑bake chocolate peanut butter oat bars: a sweet, crunchy treat that turns ordinary pantry staples into instant satisfaction.
Since my kids love chocolate and I’m always looking for ways to keep healthy snacks on hand, these oat bars hit all the right notes. They’re quick, they’re wholesome, and they’re utterly comforting—think peanut butter bliss wrapped in chocolate haze.
Mine, I call them “Breakfast‑in‑A‑Bar” because they’re perfect for a pre‑lunch boost, a post‑workout energy pick‑up, or a bedtime wind‑down. The best part? No oven needed—every bite is ready in minutes.
- ●●Fuss‑free: no baking, just simple mixing.
- ●●Balanced flavor: sweet, nutty, and chocolatey in harmony.
- ●●High‑fiber oats give lasting satiety.
- ●●All‑natural ingredients with no artificial additives.
- ●●Set‑and‑forget: prep, let sit in fridge, rock and roll.
Essential Ingredients |
1 cup rolled oats – the chewy foundation that locks in texture.
1 cup creamy peanut butter – delivers rich protein and velvety smoothness.
1/2 cup honey – natural sweetener that binds everything together.
1/2 cup dark chocolate chips – melts into gooey pockets of chocolate.
1/4 cup melted coconut oil – adds subtle tropical depth and keeps the bars cohesive.
1 tsp vanilla extract – a fragrant lift that brings all flavors forward.
Pinch sea salt – sharpens sweetness and balances richness.
 Let’s Make it Together |
- In a saucepan, combine honey, melted coconut oil, and vanilla extract. Warm gently until blend smooth.
- Remove from heat and stir in peanut butter until glaze‑like.
- Cool slightly, then fold in oats, chocolate chips, and sea salt until evenly coated.
- Press the mixture firmly into a lined loaf pan, ensuring an even surface.
- Refrigerate for at least 30 minutes, or until set.
- Lift from pan, cut into bars, and serve or store.
●Use high-quality dark chocolate chips for the richest melt; milk chocolate melts too quickly and may run.
●Press the mixture tightly; a loose base results in crumbling texture.
●Let the bars rest in the refrigerator at least 30 minutes—warm room temperatures will leave them soft.
●If you prefer extra crunch, sprinkle a handful of chopped nuts on top before refrigerating.
●Store bars in an airtight container to keep them from drying out; they stay fresh for a week.
Perfecting the Cooking Process |
Because there is no baking, the key temperature element is the honey‑oil blend. Warm it only until it’s fluid—overheating can scorch the honey and alter flavor.
After pressing into the pan, make sure to smooth the top with a spatula; this creates an even cooling surface and reduces gaps where crumbs can form.
Add Your Touch |
Swap the peanut butter for almond, cashew, or sunflowerseed butter for a different flavor dimension.
Choose light or dark chocolate chips—or even white chocolate—to tint the bars to your liking; sprinkle edible glitter for a fun twist.
Storing & Reheating |
Keep bars at room temperature in a covered tin or stick them into a zip‑lock bag with a paper towel for air circulation.
If you want to revive crispness, warm a bar in a microwave for 10‑15 seconds—just enough to unlock a chewy center.
●Use a silicone cooking mat on the pan; it prevents stickiness and makes clean‑up effortless.
●To avoid oily bars, strain the honey‐oil mixture over fine mesh to remove any foam before mixing.
●For thicker bars, add an extra half cup of oats; thinner bars taste airy and light.
●When cutting, use a serrated knife and press down gently—squeeze the bars after cutting to keep shapes intact.
●For a quick protein boost, mix in a scoop of plant‑based protein powder during the peanut butter stage.
FAQ |
- ●Q: Can I freeze these bars?A: Yes—freeze in airtight packaging and thaw for 15 minutes before eating.
- ●Q: Are they dairy‑free?A: Yes, as long as you use dairy‑free chocolate chips.
- ●Q: What’s the shelf life at room temperature?A: Approx. 3 days in a cool, dry place.
- ●Q: Do I need to cut the bars before refrigerating?A: Cutting after sets easier for clean cuts; a firm set leads to crisp edges.