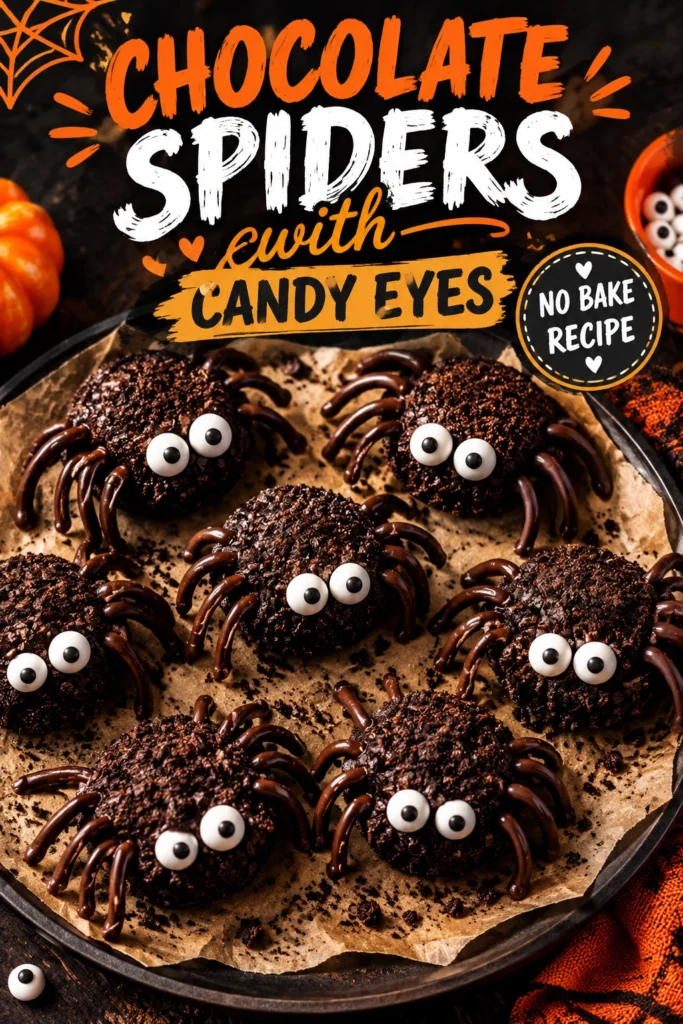
These treats offer a satisfying snap from the pretzel legs and a smooth, rich melt from the chocolate body.
Chocolate spiders are a whimsical, no-bake dessert that transforms basic pantry staples into spooky characters. They rely on a simple assembly process that requires very little active effort.
Many home cooks appreciate these because they eliminate the need for complex baking or expensive equipment. The process is straightforward enough for children to help with the assembly.
Unlike store-bought holiday candies, these allow you to control the quality of the chocolate and the saltiness of the pretzels. You can customize the flavor profiles to suit different tastes.
Families looking for a low-stress activity during the October season will find these particularly rewarding. They make a visually striking addition to any themed dessert platter.
The combination of sweet and salty creates a balanced flavor that appeals to both adults and children. This recipe pairs well with other themed sweets like Irresistible Mouthwatering Fall Chocolate Covered Oreos
Gather your ingredients and follow the steps below to create these creepy-crawly treats.
- ●Why You’ll Love This Recipe
- ●A Brief Background on Why This Works
- ●Perfect For Spooky Parties and Kid-Friendly Activities
- ●Chocolate Ingredient Spotlight
- ●Pretzel Ingredient Spotlight
- ●Key Ingredients
- ●How to Make It
- ●Pro Tips
- ●Delicious Variations
- ●Best Ways to Serve
- ●Storage and Leftovers
- ●Frequently Asked Questions
- ●Why This Recipe Belongs in Your Weekly Rotation
- ●Final Thoughts
Creating these treats is more about assembly than technical skill, making it accessible for any skill level.
- ●Requires no oven or stove if using pre-melted chocolate.
- ●Uses a very short list of ingredients found in most kitchens.
- ●Combines a salty crunch with a sweet chocolate center.
- ●Takes less than 30 minutes from start to finish.
- ●Allows kids to participate in the decorating process.
- ●Provides a high visual impact for holiday parties.
- ●Easily customizable with different types of chocolate.
- ●Does not require specialized baking tools or molds.
- ●Stays stable at room temperature for several hours.
- ●Pairs excellently with coffee or milk.
The simplicity of the construction means you can make a large batch quickly for a school event or a neighborhood gathering.
A Brief Background on Why This Works |
The success of this treat lies in the structural integrity of the pretzel. Pretzels provide a rigid frame that supports the weight of the chocolate without bending or breaking during the setting process.
Chocolate acts as a natural adhesive, bonding the legs to the body and the eyes to the head. The fat content in the chocolate helps it cling to the salt crystals on the pretzel surface.
Using a semi-sweet or milk chocolate provides a flavor contrast that prevents the dessert from becoming overly sugary. The salt on the pretzels enhances the cocoa notes in the chocolate.
This combination of textures and flavors ensures the treat is satisfying rather than just sweet.
Perfect For Spooky Parties and Kid-Friendly Activities |
These treats are ideal for Halloween gatherings where a variety of finger foods are served. Since they are bite-sized, guests can enjoy them without needing plates or silverware.
Parents will find these helpful for after-school activities in October. The assembly process helps children develop fine motor skills while remaining an engaging culinary project.
They also work well for school classrooms or office parties where a festive touch is needed but time for elaborate baking is limited.
Chocolate Ingredient Spotlight |
Chocolate serves as the foundation of the spider’s body and the glue for the entire assembly. High-quality chocolate with a good cocoa butter content melts more smoothly and sets with a cleaner snap.
Using a chocolate with a higher cocoa percentage results in a deeper, more sophisticated flavor. Milk chocolate provides a creamier, sweeter experience that is often preferred .
Pretzel Ingredient Spotlight |
Pretzels provide the essential crunch and structural support for the spider legs. Their salty exterior cuts through the richness of the chocolate, creating a balanced taste profile.
The thin shape of pretzel sticks allows them to be easily snapped into uniform lengths. This ensures that the spiders look symmetrical and stand upright on a serving tray.
Key Ingredients |
A few simple items are all that is needed to bring these spooky creatures to life.
- ●Chocolate — forms the central body and secures the other components.
- ●Pretzel sticks — act as the legs and provide a salty crunch.
- ●Candy eyes — give the spiders a face and a playful personality.
- ●Cooking oil or shortening — prevents the chocolate from seizing and adds a slight gloss.
How to Make It |
Follow these steps to assemble your chocolate spiders with precision and ease.
- Prepare the legs: Snap the pretzel sticks into pieces approximately two inches long. Ensure the pieces are relatively equal in length so the spider doesn’t lean to one side when the chocolate sets.
- Melt the chocolate: Heat the chocolate in a microwave-safe bowl in 30-second intervals. Stir between each heating cycle to avoid scorching the cocoa solids, which can make the chocolate grainy.
- Smooth the chocolate: Stir in a small amount of oil or shortening once the chocolate is melted. This creates a thinner consistency that makes dipping and drizzling much easier.
- Form the body: Spoon a generous dollop of melted chocolate onto a parchment-lined baking sheet. Use the back of the spoon to flatten it into a small, thick disc about one inch in diameter.
- Attach the legs: Gently press four pretzel pieces into each side of the chocolate disc. Press them deep enough to ensure they are anchored, but avoid submerging them completely in the chocolate.
- Add the eyes: Place two candy eyes on the top of the chocolate disc. Do this while the chocolate is still wet so the eyes adhere firmly without needing extra glue.
- Set the spiders: Place the baking sheet in the refrigerator for 15 to 20 minutes. This rapid cooling helps the chocolate harden quickly, ensuring the legs stay in place.
1Small adjustments in technique can lead to a more professional-looking result.
- ●2Use parchment paper: Always line your tray with parchment or silicone mats to prevent the chocolate from sticking to the pan.
- ●3Avoid water: Ensure your melting bowl is completely dry, as a single drop of water can cause the chocolate to seize and become a clumpy paste.
- ●4Temperature control: If the chocolate is too hot, it may melt the candy eyes; let it cool slightly before adding the decorations.
- ●5Consistent sizing: Use a measuring spoon to scoop the chocolate for the body to ensure every spider is the same size.
- ●6Steady hands: Place the pretzels in a criss-cross pattern to provide more stability for the spider’s body.
Delicious Variations |
You can easily adapt this recipe to fit different dietary needs or flavor preferences.
- ●White Chocolate Spiders: Swap the dark chocolate for white chocolate for a ghostly appearance.
- ●Dark Chocolate Sea Salt: Use 70% cocoa dark chocolate and sprinkle a pinch of flaky sea salt on top.
- ●Nutty Legs: Use almond slivers or pretzel-coated nuts for a different texture.
- ●Colorful Bodies: Stir in a drop of food-grade oil coloring to make purple or orange spiders.
- ●Peanut Butter Center: Place a small peanut butter cup in the center before adding the chocolate coating.
These variations allow you to create a diverse platter of treats for any occasion.
Best Ways to Serve |
Presentation is key when serving holiday-themed treats to guests.
- ●Arrange the spiders on a faux-cobweb lace tablecloth for a thematic look.
- ●Serve them in a bowl with a mix of other chocolate treats like Effortless Triple Chocolate Crinkle Cookies Recipe
- ●Place them on a platter with orange slices and grapes for a colorful contrast.
For a more interactive experience, serve the spiders alongside a warm beverage. The heat from the drink helps the chocolate melt slowly in the mouth.
If serving at a party, keep the platter in a cool area to prevent the chocolate from softening in a crowded room.
Storage and Leftovers |
Refrigerating
Store the finished spiders in an airtight container in the refrigerator for up to two weeks. This keeps the chocolate crisp and the pretzels crunchy.
Reheating
Do not reheat these treats. Heating them will melt the chocolate and cause the spiders to lose their shape and structure.
Freezing
These can be frozen for up to one month. Place them on a tray to freeze individually first, then transfer them to a freezer bag to prevent them from sticking together.
Frequently Asked Questions |
- ●Q: Why did my chocolate turn thick and clumpy while melting?A: This usually happens if moisture enters the bowl or if the chocolate is overheated. Water causes the cocoa solids to clump, a process known as seizing. To avoid this, use a completely dry bowl and melt in short bursts.
- ●Q: Can I use chocolate chips instead of baking bars?A: Yes, chocolate chips work well, though they often contain stabilizers that make them slightly thicker when melted. You may need to add an extra teaspoon of oil to achieve a smooth, pourable consistency for the spider bodies.
- ●Q: How do I stop the candy eyes from sliding off?A: The eyes must be placed while the chocolate is still in its liquid state. If the chocolate has already begun to skin over, use a tiny dot of melted chocolate as glue to secure the eye to the body.
- ●Q: What is the best way to store these if I am making them days in advance?A: Keep them in a single layer in a plastic container lined with parchment paper. This prevents the legs from interlocking or breaking. Store the container in the fridge to maintain the structural snap of the chocolate.
- ●Q: Can I make these using a dairy-free chocolate?A: Absolutely. Most high-quality dark chocolates are naturally dairy-free, and there are many coconut-oil based chocolate alternatives available. The process remains exactly the same regardless of the chocolate type used. Feel free to experiment once you are comfortable with the base recipe — small tweaks to seasoning, cooking time, or ingredient ratios can personalise the dish to suit your taste.
Why This Recipe Belongs in Your Weekly Rotation |
While these are themed for Halloween, the combination of chocolate and pretzels is a timeless pairing. You can make these any time of year the eyes or changing the theme.
They provide a quick way to satisfy a sweet craving without the commitment of a full baking project. The low ingredient count makes them an affordable option for frequent snacking.
Incorporating these into your routine gives you a go-to treat for school lunches or unexpected guests. The versatility of the base allows for endless experimentation with flavors.
Final Thoughts |
These chocolate spiders combine the richness of melted cocoa with the salty crunch of pretzels and the charm of candy eyes. They are an easy, no-bake project that yields a professional-looking result with minimal effort.
Whether you are preparing for a holiday bash or simply want a fun activity to do with children, these treats deliver on both taste and visual appeal. They are a stress-free way to bring a bit of whimsey to your kitchen.
Gather your pretzels and chocolate today to create these delightful, spooky snacks for your home.

Chocolate Spiders with Candy Eyes
- Prep Time: 10 minutes
- Cook Time: 0 minutes
- Total Time: 10 minutes
- Yield: 12 spiders 1x
- Category: Dessert
- Method: No-Bake
- Cuisine: American
Description
A playful and spooky no-bake treat featuring a rich chocolate body, crunchy pretzel legs, and cute candy eyes. Perfect for Halloween parties or kids’ activities.
Ingredients
- 12 oz semi-sweet chocolate chips
- 1 tablespoon vegetable oil
- 12 pretzel sticks
- 24 small candy eyes
Instructions
- Break the pretzel sticks into 2-inch lengths, ensuring you have 8 pieces per spider.
- Place chocolate chips and vegetable oil in a microwave-safe bowl.
- Microwave in 30-second intervals, stirring in between, until completely smooth.
- Spoon 1 tablespoon of melted chocolate onto a parchment-lined sheet to form a disc.
- Press 4 pretzel pieces into each side of the chocolate disc to create legs.
- Press 2 candy eyes onto the top of the chocolate body.
- Refrigerate for 20 minutes until the chocolate is firm.